Last night I went to FutureShop and picked up a 1GB flash memory stick.
The idea was that I would set it up for ReadyBoost. When I arrived here at Haaseltons to try it out I was faced with an annoying dialog. Windows Vista had informed me that my flash drive was not ReadyBoost compatible. On the package the drive said it supports 5MB write and 8MB read transfer rate. This should be more than enough but it seems the manufacturer embellished a bit…
Before you start, it’s probably best to reformat your USB key as FAT32. NTFS is nice, and more stable and much better in many, many ways but it might suffer a bit in performance due to overhead. Besides which… FAT32 is accessible in a greater number of Operating Systems.
How to Force ReadyBoost
ReadyBoost can be forced by editing a specific region of your Windows Registry.
Step 1: Open Regedit
Open up Regedit. There are two ways you can get there. Many of you might be pleased to know you can still open the Run Program window by pressing the Windows Key and R in combination (Win+R).
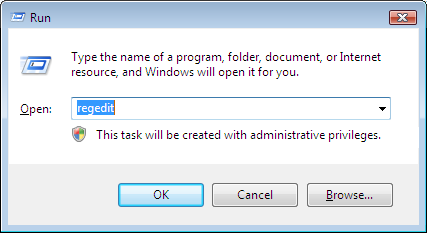
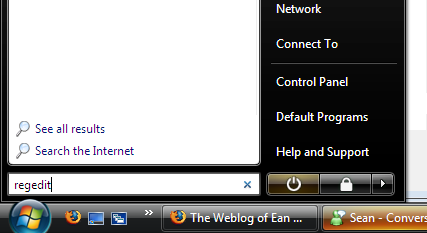
Alternately you can just type ‘regedit’ in the new Vista search dialog. It will find what you need as well.
Step 2: Find the right key in the registry.
Open the following key in regedit:
HKEY_LOCAL_MACHINE\SOFTWARE\Microsoft\Windows NT\CurrentVersion\EMDMgmt\
Do this by clicking on the HKEY_LOCAL_MACHINE and expanding that menu, then click the next and so-on. You can also find this by searching for the key named “ReadSpeedKBs”. The key will look like this:
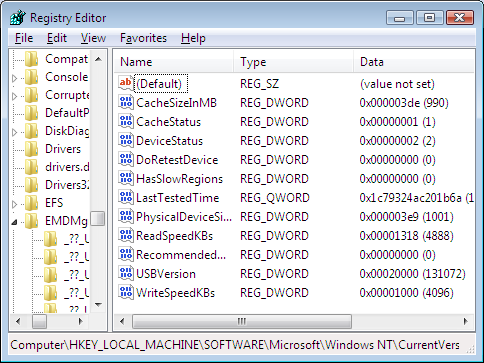
Step 3: Change the Registry to Make ReadyBoost Work
Change the registry key so that your DeviceStatus, ReadSpeedKBs and WriteSpeedKBs look like mine.
Set DeviceStatus to 4 hex.
Set ReadSpeedKBs to 1000 hex or greater.
Set WriteSpeedKBs to 1000 hex or greater.
Step 5: Enable ReadyBoost
Close Regedit and re-open the properties dialog on your USB key.
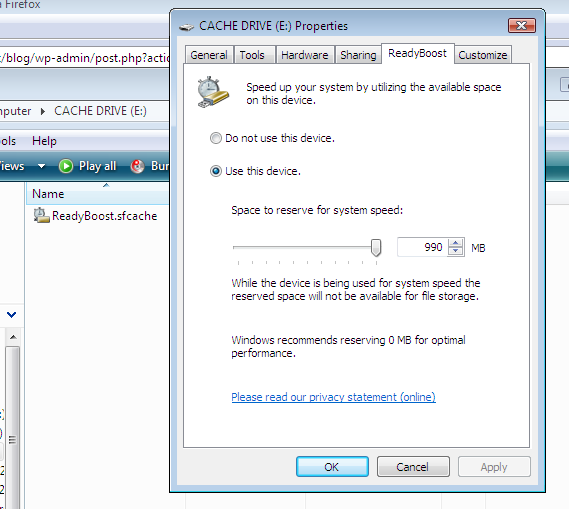
Now set ReadyBoost to use some or all of the USB key. There you have it. Now you are ReadyBoosting!
You may notice the new file created on your USB key like mine in the picture above. This ReadyBoost.sfcache file is the file that holds cached information from your Windows Swap File. If you turn off ReadyBoost it will delete this file automatically, but if you accidentally remove the USB key while Windows is running it will simply notice the cache isn’t available and keep working. Cool, isn’t it?
Part 2 : Make this change Permanent
Well now that you have a USB key whose whole purpose in life is to speed up Windows Vista. You don’t really want to lose that boost or have to plug a key into your laptop each time. Well what I did was simply open up my laptop and find a suitable amount of free space to mount the USB key. Then I coated the USB key in hot glue wherever there were metal contacts, mounted the key inside the case and soldered the USB pins to some wire which was connected to the USB terminals on the laptop motherboard.
This whole process took me about 15 minutes but it was really worth it. The reason I’m not writing a complete tutorial on this process is that if you don’t know how to do this to your machine, you probably shouldn’t try.
Make friends with your local electronics geek. Perhaps they will do it for you. If you choose a decent size for your USB key and a brand that already supports ReadyBoost you’re likely to see a decent performance increase from it.
Enjoy~